Monday, November 29, 2010

My First Thanksgiving

No, I'm not going to post some picture of me at 10 months old gumming cranberry sauce. That was the first time I was around for a Thanksgiving holiday.

This was my first Thanksgiving because it was the first time that I was in charge of cooking the turkey. Or rather, turkeys.
There were two.
For 5 people...

Being 30 has brought a number of milestones and Life Truths to light, and the first time cooking the Thanksgiving Turkey for the family was another one of them. I am always sous chef in my mother's kitchen: peeling, chopping, dicing, hefting, and generally helping to make our meals happen.
I still did all of that this year, but with the additional 100% responsibility of the birds.

And you know what?

I ROCKED THEM!

I mean, I couldn't retain my blog name if I didn't knock it out of the park now and again. (As well as go out singing until all hours every so often.)

Turkey # 1, moderately golden, totally juicy
Popular opinion seems to be that the entire purpose of Thanksgiving Dinner is just to have the leftovers as sandwiches, so my mother makes sure we have a LOT of turkey.

Specifically, two 14-pound birds. For 5 people.

I basically brought half a turkey back to NYC as leftovers.

(And I'm so full of fatty foods that I had to make some kale and white bean soup to detox over the weekend!)

And it SNOWED on Thanksgiving (in NJ)!
Granted it didn't stick to the ground, but it was still a surprise to see it falling for a couple of hours.
I maintain that our planet is actually a month ahead of our current seasonal calendar.
It's just insanity. 
And reason.

Back to the food...
We had stuffing and baked potatoes, both white and sweet, and corn and cranberry sauce... and turkey.

Turkey #2: Food Porn
LOOK at that bird! It's a friggin' masterpiece.

And no, it those dark spots are not burnt skin. They are the brown bits that were on the bottom of the pan when I cooked off the bacon that I mixed with the brandy and then poured over the turkey.
Sound familiar?
I mean really, if it works for chicken, why wouldn't it work for turkey?
I now proclaim my motto of the Three B's of Thanksgiving:
Bacon, Brandy, & Butter

(Optional 4th B of Booze for the Cook)

Close-up Turkey Porn
Ok, so the method I used was as follows:
Allow the bird 45 minutes to an hour to come to room temperature before you even think of cooking it. You want ALL of the chill off of the meat.
And you will be able to tell because you'll be getting your hands all up in that bird's business.
(Same goes for when it comes out of the oven. 45 minutes of rest before you carve it or all the juices will run out.)

Naturally, both of our "fresh" organic birds came largely frozen, so I spent the first few hours on Tuesday and Wednesday doing the cool water bath, changing the water every 30 minutes, until the birds were completely defrosted.
Don't forget to remove the bag of giblets and the neck from inside the bird's cavity.

Using about half a stick of butter per bird, I let it come to room temperature and then spread the softened butter under the skin of the bird over the breast meat.
I was NOT going to chance dry meat.
I salted the cavity of the bird as well as the skin and tossed 1 medium onion, quartered, into the bird's cavity along with some fresh thyme, because that's what my parents had in the fridge. Sage or rosemary would also be great here.
 2 cans of chicken stock + water went into the bottom of the roasting pan along with another chopped onion and 3 peeled and chopped carrots.
Preheat oven to 325º
Follow the steps in The Greatest Roast Chicken for the bacon and brandy part.


That weird looking thing is the turkey neck.
DO NOT THROW IT OUT!
Even if you don't like the giblets that come with the bird, use the neck!
I tossed it into the bottom of the roasting pan, turning it once halfway through cooking, and not only did the meat on the neck taste like roasted thigh meat, it also exuded collagen into the drippings which make for a thicker gravy later on.
Also, it's fun to snack on.

Using my grandmother's rule of thumb, I roasted the birds at 325º for 12 minutes per pound.
I basted every 20 minutes or so, and when the skin on the breast meat started to look like it was pushing the line between crispy and burning, I covered it with tinfoil.

And now for the extra brilliant part.

I took the skin I reserved from Turkey #1 (roasted and carved the day before, so the skin would be soggy Day 2) and put that skin ON TOP of the foil so that it would re-crisp for the final 20-30 minutes.
I even basted the skin once. 
It was delicious.
Cracktacular skin
Don't believe me? My brother posted this the day after Thanksgiving:


And as it was his idea for me to take over The Bird this year, and he's quite particular about the quality of his food, I was over the moon when he posted this online on Thanksgiving:


Pardon me while I get a bit weepy, and also walk around pumping my fists at the sky and calling myself The Queen of Turkey.
(And no, that's not a political statement.)

Back to cooking points:
Finally, and most importantly, you must let your turkey rest for roughly 45 minutes to an hour, depending on the size it may be longer, or else all the butter under the skin, bacon fat and brandy in the world will not stop the juices from running out and giving you a dry bird.

A note on carving:
I find it easiest to loosen the legs and remove first the drumstick, and then the thigh. Next remove the wing as a whole piece. Any joint you have trouble with, place the tip of your knife into the meeting of the bones, and wiggle a bit until it separates.
Finally I carve the breasts off as one large piece each and slice them crosswise so each piece has a bit of skin attached.
And of course afterwards I get in there with my fingers to tear all the little scraps of meat that are missed by "pretty presentation" carving so that no part of the delicious bird goes to waste.
Except for the bag of giblets.
Oops.
Oh well.

I hope everyone had a lovely Thanksgiving, that you have come out of your Turkey Comas feeling rested and rejuvenated, and that the rest of the holiday season treats you well.

Queen of Turkey, out.


Monday, November 22, 2010

Roasted Squash Polenta w/ Sage-Pistachio Mascarpone & Sautéed Mushrooms

OK - I'm getting one Thanksgiving-esque food related post in before the holiday is upon us. Then I'm back to my regularly scheduled randomness.

I totally winged this recipe in an attempt to recreate a new dish from one of my long-standing regular haunts, Five Points. 
The owner is now the chef and there have been a lot of overhauls, not all of which are stellar.
(Ahem: the "Limit 2" on the $5 Happy Hour Martinis. Boo hiss.)
However, this has been a starter on the menu lately, and I decided to try to make it at home.

The major reason I avoid making polenta at home is that a) it's time consuming, and b) I don't actually want to know just how much butter, cream, and cheese restaurants put in it to make it tasty.

However, I risked it tonight, and knowing full well that it would be both a fattening AND healthy dish.
And I did a pretty decent job recreating it, if I do say so myself.
And I do.
Obviously.

Raw and ready to roast!
I started by carving up an acorn squash, drizzling it with olive oil and salt, and roasting it in a 425º oven for 45 minutes, turning it once halfway through.

Serious color = serious flavah
For the mushrooms I used a combination of dried (reconstituted) porcini mushrooms and fresh baby bellas. I sautéed them in a combination of olive oil and butter until they were really catching color, at which time I added salt and one grated clove of garlic.

Once the garlic was fragrant I added some of the reconstituted-mushroom liquid and a splash of dry sherry and let it cook out a bit.

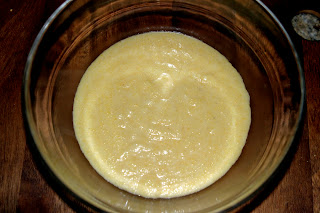
Bland base...
I used quick-cooking polenta because... well... it only takes 5-8 minutes! I was extra harried in the kitchen since I was experimenting without a recipe and juggling FAR too many things at once.
(Three pans on the stove as well as the oven and I just did not have 35-45 minutes to stand there stirring regular polenta. Why so many pans? Well I had to make something the hubs would eat as well, what with his anti-mushroom feelings. Grumblegrumblegrumble...)


If you were to eat the quick-cooking polenta plain it really is sub-par.  It needs LOTS of help.
Luckily all the additions here make it fabulous. I followed the instructions on the box, made about 1/2 a cup dry to the one acorn squash, heavily salted it, and about a minute before it was done cooking I added a mix of milk and cream.

It was still rather dull, until...

... now super tasty
... you add the roasted squash! I just carved the flesh out of the skin and mixed it all together with a knob of butter. Suddenly it was an interesting flavor and texture. (Check for seasoning again.) But it was missing the big finish:

Mascarpone!!

I used about a tablespoon per serving (hefty but worth it), and had previously mixed 3 TBSP of mascarpone with 2 fresh leaves of sage, finely chopped, as well as a couple shakes (probably only 1/4 tsp) of dried sage, and 1/4 cup of chopped pistachios. 

Voila!
Serve up the squash-polenta mixture, top with a dollop of the sage-pistachio mascarpone, and then top with the sautéed mushrooms and extra pistachios.
Be sure to stir the mascarpone into the mix while it's hot to create a really decadent mouth-feel and flavor.

Of course, when I served this to the hubs, I omitted the mushrooms and served it as a side dish to some rosemary & pecorino-stuffed pork tenderloin. But that's his own problem.
Well, technically it became my problem as that made for the extra pan on the stove and in the oven while doing other things for the first time.
But it all worked out, and he really liked the dish sans mushrooms. 
So he gets to live.
I mean, hey, 'tis the season and all that.

While I do not suggest trying a new dish if you have company coming for the holidays, I definitely suggest trying this before squash season passes us by, because it is a VERY satisfying dish.
And I am seriously looking forward to leftovers tomorrow!


Friday, November 19, 2010

Outside The Box

OK - I have a backlog of posts I need to write up, so my cop-out post of the day is the following:

The Best Pizza Box Ever
(or that I have found thus far...)

Click to enlarge

But whoever designed this box is clearly someone I need to be friends with, because this is the kind of thing that I would write on a pizza box! Except for the waiting for hours part. I am not cool with delivery that takes longer than 30-40 minutes. That's just uncool.
They could also use a little help in the spelling/punctuation field, but I forgive that because it still made me laugh out loud.
And the pizza was pretty good.

Soon: actual posts about food...

Monday, November 15, 2010

Smoked Chipotle Pork

This meal came about for two reasons:
1 - The Spanican Chicken was über tasty, so the hubs requested more meals in that vein
2 - I bought some new smoked chipotle pepper flakes, and wanted to use them.

The marinade for this started out very much in the same vein:
1/2 tsp smoked Spanish paprika
1/4tsp chili powder
1/2 tsp cumin
1/4 tsp coriander
1/2 tsp dried oregano
1/2 tsp smoked chipotle pepper flakes
1/2 tsp salt
a pinch of cayenne (less than 1/8 tsp)
(above measurements are all approximations)
2-3 cloves of garlic, grated
1 1/2 TBSP olive oil

Stir all into a paste to combine and then rub into the tenderloin and refrigerate 3-4 hours.
When you're ready to cook and have let the tenderloin come to room temperature (20 minutes minimum) cook in a nonstick pan with only a splash of olive oil, about 6 minutes on the first side.
Then flip and place in a 425º oven for another 7 minutes or so, depending on the size of the tenderloin.

(.85lb-1lb tenderloins take roughly 7 minutes per side in my kitchen. 1.25lb - 1.75lb can take as much as 12 minutes per side. Read your package to determine the weight of your portion. These times are intended to leave you with a light pink center to the pork, but also, use common sense. If after 8 minutes your tenderloin is only opaque 1/4 of the way up, it needs more time before flipping.
For exact internal temperatures, refer to this post.) 

The char bits are flavor!
Remove the tenderloin to a separate plate and allow to rest 10 minutes before carving.

For the vegetable I made haricot vert, lightly sautéed with 1 very small clove of garlic, olive oil, salt,  and lemon juice. (Only about 1/4 of a lemon, or 1/2 tsp)
The brightness and crispness was a nice counter flavor to smokey tenderloin.

I rounded out the meal with a delicious side of leftover quinoa with chorizo, because what meal doesn't need more porky goodness?

If your family is craving something flavorful and smokey, this is your new go-to meal.

Friday, November 12, 2010

Colorful Quinoa Concoction

I am quite pleased with myself.

I made for dinner something completely out of the ordinary, and it was quite successful, so I am extra pleased to have concocted something tasty that was out of my comfort zone. I mentioned before that I have accidentally bought fresh Mexican-style chorizo instead of the Spanish-style that I prefer. This time I intentionally bought the Mexican style because it was on super-sale and I figured I could doctor it up to my (Spanish-style) liking.
I succeeded by barraging it with spices and garlic.
Lots of garlic.

Before starting on the meat or veg, measure out 1 cup of quinoa and rinse it well in a sieve. Add it to a pot with 2 cups of water, set to boil, and then bring down to a simmer. Cook until all the water is absorbed, about 15 minutes.
Mexican chorizo is raw. Spanish chorizo comes fully cooked.
Step one: remove the thin casings from the fresh chorizo and chop it into bite-sized pieces.

Add the chopped chorizo to a hot non-stick pan with a few tablespoons of olive oil.
As the sausage browns and cooks, add the following to taste: 
Smoked Spanish Paprika (at LEAST 1 TBSP if not more)
Cayenne Pepper (I only used 1/2 tsp as we don't usually do spicy. Just enough for a little heat in the back of the throat.)
Cinnamon (also about 1/2 tsp)
3-4 cloves of garlic, grated
Salt to taste

While that is becoming delicious, remove the stems from 1 bunch of swiss chard (I used green, but use whatever dark leafy green makes your palate happy)
Give the leaves a rough chop  (until it is almost the size of a mix of baby lettuces) and the stems a finer dice. Give the stems an extra couple of minutes to cook before adding the leaves.

By the time the meat was done cooking my quinoa was cooked as well, so I strained the meat from its oil and placed it in the pot with the hot quinoa. (leave the seasoned oil in the pan)
If desired, you can sprinkle 1 TBSP of olive oil and a pinch of salt in the pot of quinoa before adding the seasoned sausage. I skipped this step as there was a bit of oil left in the pan for the greens.

Place the chopped greens into the pan with the colorful and flavorful oil, season with salt, and cook until wilted. (Remember, stems first.) 
It really wilts down dramatically.
While the greens were wilting, I was grating about a cup of ricotta salata to throw in the dish.
I had a lot of trouble deciding what cheese would work best in this dish. I could not find any queso fresco, which seemed like the logical topping for this, so I chose the subtle salt and tang of ricotta salata, and I was quite pleased with how it all came out. 

I threw most of the grated cheese and all of the wilted greens in the pot with the quinoa and sausage to mix it all thoroughly before spooning it into bowls for devouring.
Topped with a little extra cheese, it really was a very satisfying meal, and an excellent use of quinoa. 
(Something I am always trying to find!)
Try this as a hearty Fall supper, or even a side dish for the holidays!

Monday, November 8, 2010

A Marathon of Quick Tips

Yesterday was the 2010 NYC Marathon, and the hubs ran it in 3 hrs 45 minutes!
Yaaaaaaaaaaay!!!
And he was still able to walk and talk afterward!
Yaaaaaaaaaaaaaaaaaaay!!!

I'm sure the fact that I helped him train this year accounts for his impressive time... or... you know... the fact that he is something of a natural runner. Something I have never been.
Also, I'm sure this inspired him to power through after Mile 19:

I'm awkwardly holding up a sign cheering him on and trying not to thwack him with it.
Awwwwwww....
I am torn between being very proud of him, and wishing for the sake of our old age and old knees that he would retire in the VERY near future. Unfortunately, something tells me he isn't retiring from marathon running any time soon, as he came home with literature on the Washington D.C. Marathon, as well as one in Rome this coming Spring.
He might be able to twist my arm into cheering him on in Rome... we are taking donations towards our airfare now. :)

In response to a recent reader's comment (a.k.a. - Why didn't you tell me that would happen?!) I'm going to throw a few more tips your way in this post.

Fresh Herbs:
Fresh herbs are wonderful. They can instantly brighten leftovers, bring an otherwise mediocre meal to life, perfume your whole kitchen, and do it all with basically zero calories.
Note: when using fresh herbs, remember that they contain minute amounts of water within them, so if you throw them whole into a pan of hot oil, they will pop and attempt to leap directly out of the pan, and can spatter you with hot oil at the same time.
Other than making sure your meat browns properly, that is also why you always want to make sure any protein you are cooking/searing is pat fully dry. It's not fun when your food spits back at you.

Garlic:
As you may have noticed from my recipes, I really enjoy cooking with garlic. Not only is it delicious, but it also helps your immune system fight off ills. I consider it a staple flavor in many of my meals.
Note: If you are following any recipes of mine in which I say to grate the garlic and then only give it about 30 seconds to cook in the pan, that is because I am using a superfine Microplane grater, and the resulting garlic is now a wet paste that only needs 30 seconds to cook before it could start to burn.
If you are in fact mincing the garlic in your home, or finely slicing, feel free to give the garlic a good 2 minutes in your hot pan to allow the flavors to sufficiently mellow.

Sauces:
When any sauce or gravy tells you to start off with onions and garlic, I suggest keeping your pan on medium to medium-low while they sweat out. Onions first, and when they are almost ready, the garlic. Once you have added either a liquid (stock, wine, etc) or a can of crushed tomatoes, then turn your heat up to medium-high to simmer. That way you avoid bitter and burnt onions and garlic.
Also, add your fresh herbs after the onions and garlic have finished cooking and the heat is still low. Then they won't act like popcorn in your pan.

Meat:
When I tell you "about 7-9 minutes" as a cooking time, say when a pork loin is finishing up in the oven, I'm telling you what I'm doing in my kitchen in my oven, based on whatever size cut of meat I happen to have that day. Even tho every oven can be set to 425º, that does not mean that every oven is actually at 425º, and a tenderloin can vary from .75 lbs to 1.5 lbs and require very different cooking times.
Because I cook every day, I generally have a feel for when my food should be done.
And yes, on occasion, I have cursed a blue streak after discovering my psychic cooking abilities have failed me and I have to somehow salvage undercooked meat.
But for Tried-and-True cooking times, the use of an instant-read thermometer is always a safe bet. Some ovens come with probes included, but if yours does not, you can easily pick up meat thermometers at just about any store that sells kitchenware.
I got the following charts from What's Cooking America (because I'm way too lazy to retype this whole thing!) Except for my thoughts on "Well Done"*.
And remember, large roasts and birds will continue to cook for a bit once you remove them from the oven, so it's good to take them out when they are about 5-10º shy of your desired doneness.


Beef and Lamb Cooking Temperature Chart
 

Roasts, Steaks & Chops


Rare
120 to 125 degrees F

center is bright red, pinkish toward the exterior portion

Medium Rare

130 to 135 degrees F
center is very pink, slightly brown toward the exterior portion

Medium

140 to 145 degrees F

center is light pink, outer portion is brown

Medium Well

150 to 155 degrees F

not pink

Well Done
160 degrees F and above


steak is uniformly brown throughout *(and a waste of good meat)


Ground Meat


160 to 165 degrees F
 

no longer pink but uniformly brown throughout


Poultry Cooking Temperature Chart
 

Poultry (Chicken & Duck)


165 degrees F

cook until juices run clear


TurkeyNOTE: A 12-lb turkey can easily handle 60 to 90 minutes of resting. During that time, temperature can rise 30 degrees if not exposed to drafts.
 

165 degrees F


juices run clear - leg moves easily


Stuffing (cooked alone or in turkey)
165 degrees F


Pork Cooking Temperature Chart
 

Roasts, Steaks & Chops


Medium


140 to 145 degrees F


pale pink center

Well Done


160 degrees F and above


steak is uniformly brown throughout


Pork ribs, pork shoulders, and beef brisket
160 degrees F and above
medium to well done


Sausage (raw)


160 degrees F


no longer pink


Ham


Raw
160 degrees F


Pre-cooked
140 degrees F


For more of my Cooking Basics check back to this post.

For Knife Skills and Care, take a gander back here.

Hope this helped.

Friday, November 5, 2010

I Don't Cook with Political Correctness

Why not?
1 - I am not a Vegetarian. Eating the flesh of other creatures seems fairly un-P.C. to me on whatever scale you might use. (But it's tasty!)
2 - I am not a Vegan (In my book, a sure sign of sanity, if I ever there was one.)
3 - I have recently rediscovered veal, and I reeeeeeeeeeeeally like it.

I have made a supremely delicious veal ragú recently, and I have since moved on to veal chops. Tonight's dish:
Veal Chops w/ Sage Drizzle and Buttered Peas


Sage is an interesting herb. I think it's one of the herbs I can't always place when I'm eating something. That, and when I cook with it I can't help petting it, marveling that someone picked a fragrant, fuzzy leaf and deemed it edible.
The fuzz-factor kind of throws me off.
However, on to the meal.

For the veal chops:

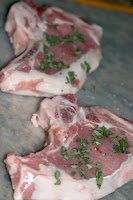
Sprinkle both sides with salt (and pepper if you like) and chopped sage. Press the sage into the sides of the meat.
In a hot skillet on medium heat, melt 1 TBSP olive oil with 1 TBSP butter. When almost rippling, add the veal chops and cook for about 5 minutes on each side. (1" thick chops)

Once you remove the chops from the pan, deglaze with white wine and cook down to create your "Sage Drizzle".
Aside: OMG I cooked a meal without garlic!!! Someone check me for a fever!

For the peas, I melted a tiny bit of butter and oil in a pan and fried a couple whole sage leaves to infuse the oil/butter mixture. (Also saved for presentation of the dish.) Then I added the peas and cooked them until tender, about 3-5 minutes.
This meal was very delicate in flavor, so don't make it if you're taste buds are crying out for a balsamic kick or the zing of fresh ginger.
However, it was juicy and delicious, and I wanted a whole extra chop after finishing the meal.
Damn.

Aside: Last night I saw "The Merchant of Venice" on Broadway with Al Pacino in the role of Shylock. The cast was really solid, and Pacino was very good... tho occasionally I thought he was just being crazy Pacino instead of vindictive Shylock. And anyone in the first 5 rows got a personal baptism from Pacino's very lips. (I'm glad I was a bit farther back...)
If you can't make it to NYC, you can always watch it (with this very pretty cast...) on dvd http://www.imdb.com/title/tt0379889/

Tonight: Interpol!

Tuesday, November 2, 2010

Special Delivery

So I have had a cold since Tuesday, October 26th (that's 8 days for anyone counting...), and I am REALLY FREAKIN' TIRED OF IT!
I'm done!
Move on!
I have served my time in aches and chills and sneezes and sinus headaches, so germs:

GET LOST!

The real kicker is that a week before I fell ill, I made a large pot of homemade chicken soup for two friends that were sick, one downtown and one in Brooklyn, and delivered* them to the various parties without touching them or anything else, and then used hand sanitizer as soon as I left.
So me getting sick? Totally Not Fair.

The soup
Fortunately I had made so much soup that I had some leftover for myself to defrost when I fell ill.
The soup consisted of:
chicken stock, homemade
2 chicken breasts poached for 20 min in the stock, then removed and shredded
carrot/celery/onion trifecta, sautéed in a bit of olive oil
cubed butternut squash, roasted in the oven
pasta
salt
thyme
dill
and of course, love.

However, as I am still feeling less than stellar, I can't be bothered to tell you proportions or order of operations, or really anything useful, because I did the whole thing off the cuff anyway.

But I took a picture of my soup.
So I posted it.
It was tasty.
Tho clearly lacking magical restorative powers...

Now I must get healthy as my in-laws arrive tomorrow to watch their son (my hubs) run in the NYC Marathon on Sunday, and I need to not be coughing and sneezing on them.
So send good vibes, people.
Get 'er done.

*The Rock 'n Roll Gourmet does not actually have a delivery service, so don't get your hopes up... 

Monday, November 1, 2010

Sage & Pecorino Stuffed Pork Tenderloin

More experimentation, inspired by what's on hand and what might only have another day or two of a shelf life.
And it worked!!

I feel as though all I ever cook (and so all I really write about on here) are dishes consisting of chicken breasts or pork tenderloins. Again, because they are both affordable and healthy lean proteins, and also because they ensure that I can make dinner in under half an hour most nights.
The only problem is redundancy of meals!

So this time 'round I had fresh rosemary, some sage that was on its last legs, and as always I had pecorino cheese. So, I decided to stuff my tenderloin instead!

I made a slice straight through the center, but refuse to hammer out the meat. Yes, if you do so, you could get more of a roll going, but that isn't the point. I like my meat PLUMP and juicy, and when you beat chicken or pork into a cutlet or schnitzel-ready, you just destroy the meat.
At least that's my opinion.

Since this was only a .85lb tenderloin, I only used 1/4 of a sprig of fresh rosemary, finely chopped, and about 6 sage leaves, also finely chopped. However much fresh herbage that creates, add an equal amount of grated cheese. Sprinkle that down the center of your tenderloin pocket and roll shut.

Use a little butcher's or kitchen twine to make sure your tenderloin stays closed and your filling stays inside.
Season all over with salt, and add it to a hot pan to brown.

Brown all sides and throw into a 425 degree oven for 7-10 minutes (for a tenderloin as small as this one I only needed 7 minutes.)
Remove to a plate to rest and start the gravy.

To the oil and drippings in the pan I added 1 small shallot, diced, 1 clove of minced garlic, and a bit of salt. Once that has softened I add a little flour and stir to incorporate it well, and then throw in more diced sage. Maybe another 5 leaves worth.
(Remember, this was just to feed 2 people.)
Add equal parts chicken stock and white wine and reduce.


That pork looks a bit pinker than it did in real life, but it was tender and delicious. The sage was aromatic, the cheese had a bit of bite that worked surprisingly well with the pork, and the small bit of rosemary made the whole dish feel earthy and pulled together.
(You could go with just one or the other herb. I happened to have both, so used both.)

The hubs approved and it will definitely be a new addition to the dinner rotation!